


A few weeks ago I gave you a little tour of my dressing room. The centerpiece of the room is my vanity table. This table was truly a labor of love. I searched for months before moving into our new house, but just couldn't find anything that fit all of my requirements, until I found this tutorial on Pinterest. And now I am giving you some more detailed instructions on how to construct this vanity using an Ikea shelf, table legs, and cheap doo dads from the hardware store.
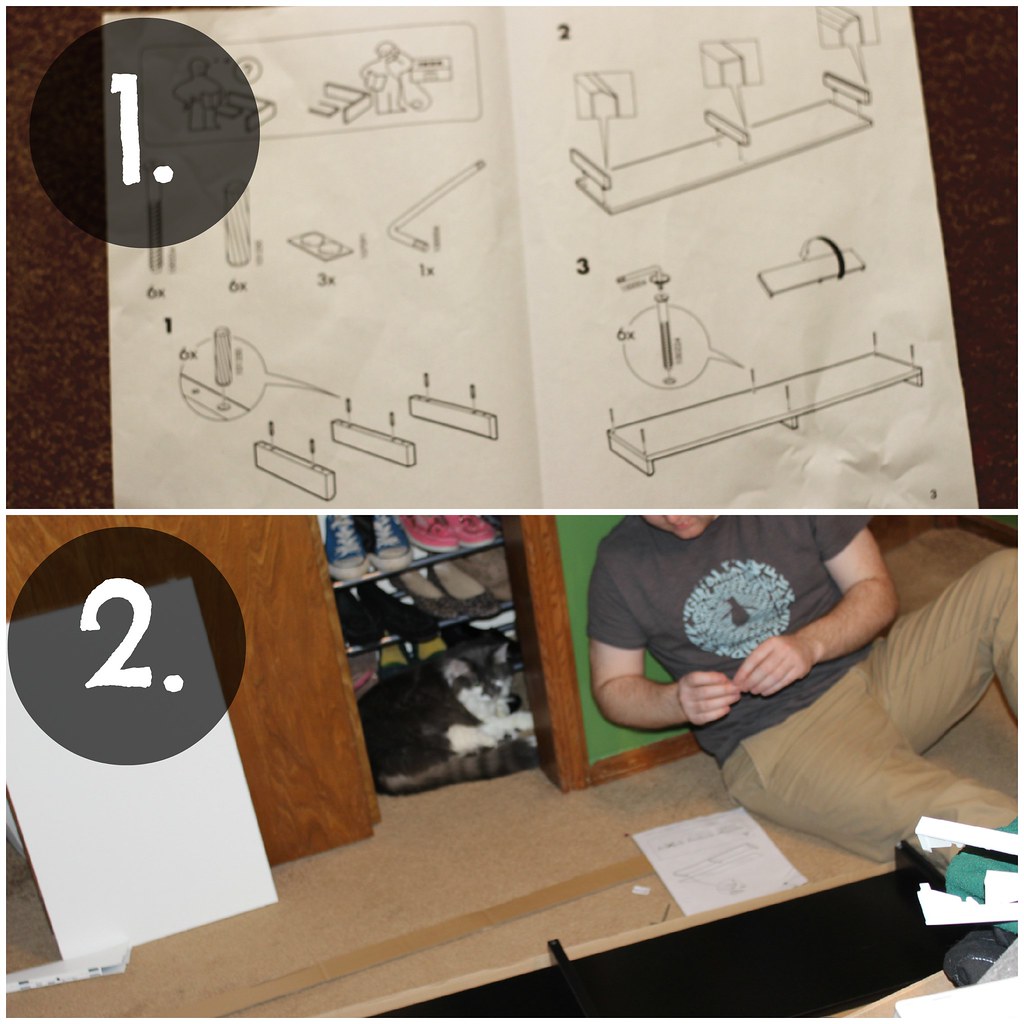
Step 1: Construct the shelf as per the Ikea instructions. Seriously, it's super easy. You only need the Allen key that comes with the shelf.
Step 2: Make sure to have an attentive supervisor. This is probably the most important step.
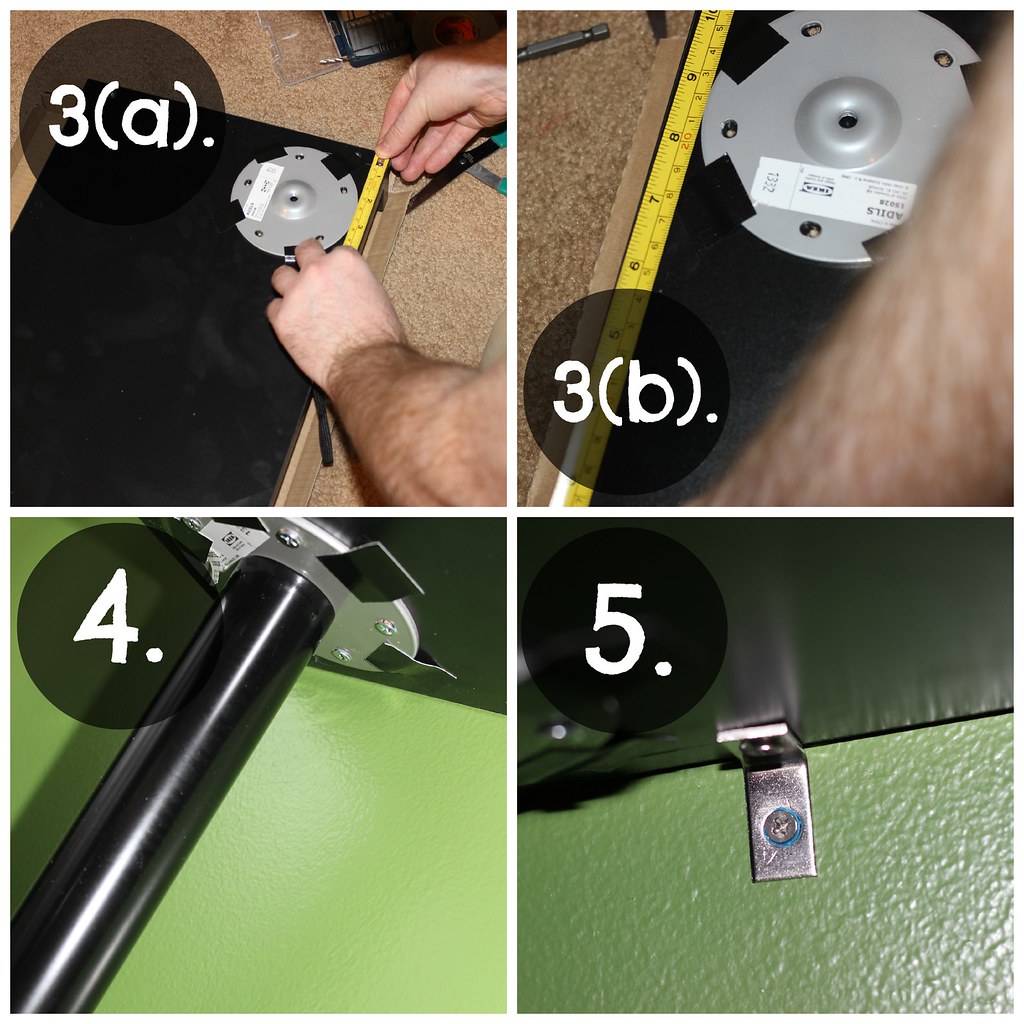
Step 3: Lay out the mounting plate for the table legs on the bottom of the shelf. I laid it out such that the center of the mounting plate was 2 inches from the sides of the shelf. I used black electrical tape to hold the mounting plate in place and then attached the mounting plate by using a drill to screw in the screws.
TIP: Do not use the screws that come with the legs to attach the mounting plate to the shelf. The shelf is thinner than the tables these legs are meant to accompany. I believe I used 3/8' screws, but measure the thickness of the shelf to determine which size screw to use.
Step 4: Attach the legs to the mounting plate. They just screw in.
Step 5: For extra security, attach the vanity to the wall with L brackets.
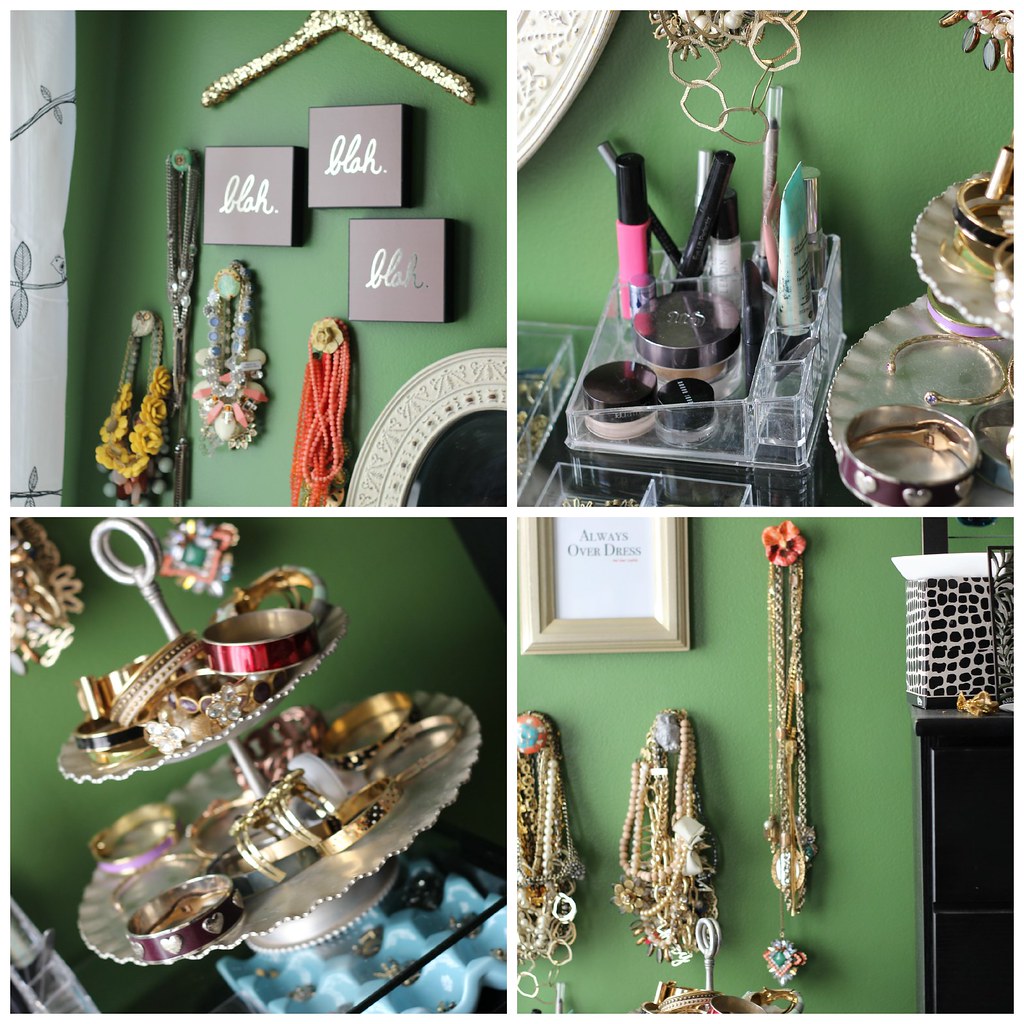
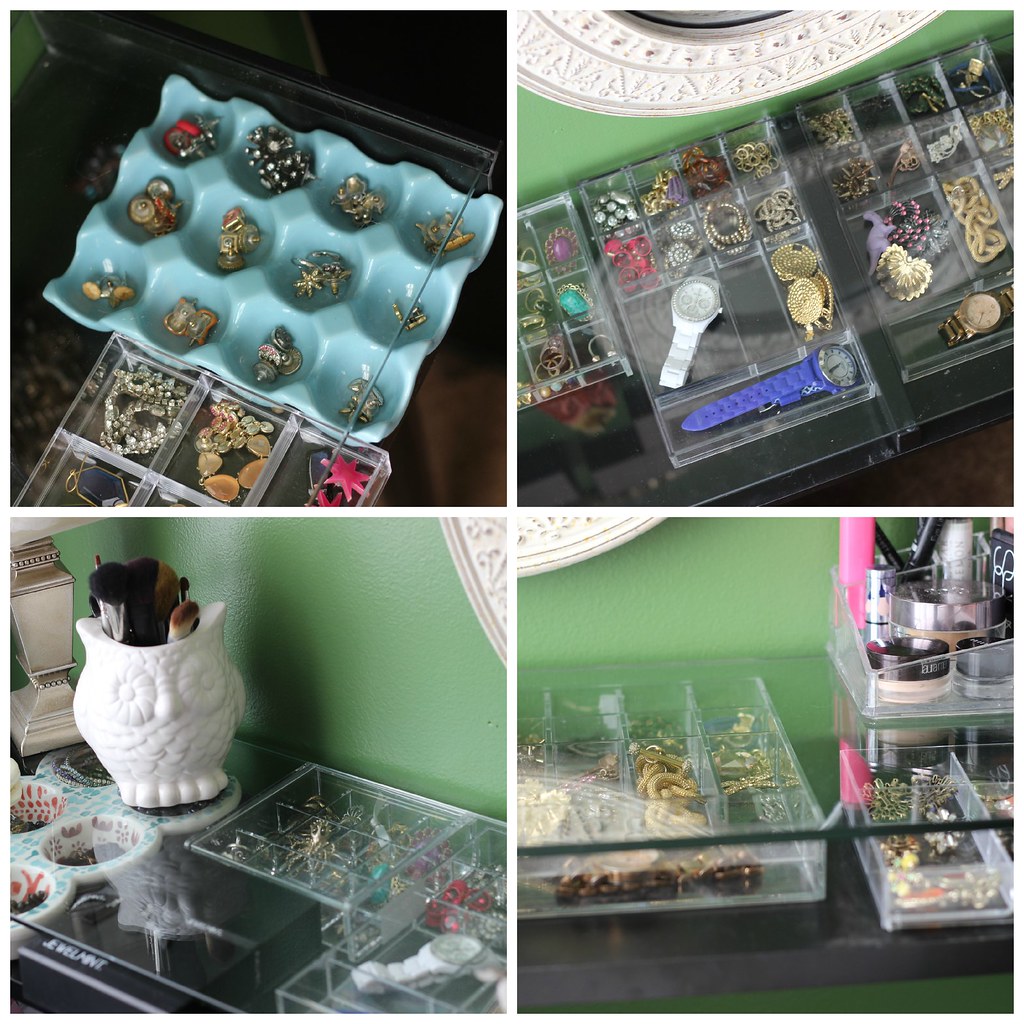
I purchased clear plastic trays from Marshall's and Home Goods to slide into the space between the glass and wood portion of the shelf. The space is pretty thin, so you have to measure it before purchasing your trays. I also had a ceramic egg tray and muffin tray from Anthropologie that also fit. I then added extra storage on the walls using dresser knobs from Anthropologie. I just drilled a hold in the wall, put in an anchor and then screwed the knobs directly into the wall. Easy peezy!
The entire installation of the vanity and the wall accessories only took about 2 1/2 hours. It was a surprisingly quick little weekend project!
And I hope to be sharing more home DIY projects in the future!
Linking up with The Style Record, Little Miss Monday, Mix it Monday, Funday Monday, Monday Morning Gossip, Monday Mingle, Trend Spin Link Up, Stylish Tuesday, Syle Sessions, Afternoon Style, The Pleated Poppy, Transatlantic Blonde, Whims Wednesday, Because Shanna Said So, I Feel Pretty,Be.You.,tiful Link Party, Mix and Match Fashion, All Things Thursday, Lovely Blog Hop , Passion for Fashion, Simply Just Lovely, Vodka Infused Lemonade, That Friday Blog Hop, Fashion Informant Link Up, Friday's Fab Favorites, and Perfectly Coutured
Linking up with The Style Record, Little Miss Monday, Mix it Monday, Funday Monday, Monday Morning Gossip, Monday Mingle, Trend Spin Link Up, Stylish Tuesday, Syle Sessions, Afternoon Style, The Pleated Poppy, Transatlantic Blonde, Whims Wednesday, Because Shanna Said So, I Feel Pretty,